Make Creative Use of Your Paint Palettes! If you have ever taken a workshop with me you know that I am a bit obsessed with not wasting art supplies. This includes extending the use of my acrylic paints. Artist grade paints like GOLDEN, which is the brand that I use, cost a bit more so I like to get as much bang for my buck as possible. Additionally, we are fortunate here in the US to have easy access to an abundance of quality art supplies. There are many parts of the world where quality materials are not so readily accessible or affordable. Therefore, I try not to take them for granted. And, the less stuff that goes into landfills the better IMO.
After a few painting sessions paint palettes usually look pretty great. Here’s an easy and creative way to use your paint palette after it has a few layers of paint on it. You are going to make a paint skin out of it that can be used as collage material for use in other art work! To do this, I use paper palettes from the art supply store, the waxy side of freezer paper, or large plastic baggies as palettes for painting. What’s great is that not only can you use those gorgeous palettes that are created during the painting process, but you can also reuse your palette paper.
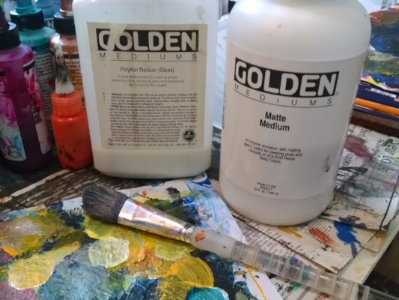
@Christine Sauer, polymer mediums for coating paint palette
©Christine Sauer, brushing medium on paint palette
Pictured above is a recent palette after a few painting sessions with several layers of acrylic paint on it. My preference is to use a palette with a variety of colors. If you have a palette that is monochromatic that will also work. You can always brush on extra color if desired. To make the palette a bit thicker and easier to peel off of the backing without tearing, brush on a coat or two of polymer medium. Here I’ve combined gloss and matte for a satin finish. Let dry completely.
©Christine Sauer, peeled paint palette skin
Once the coated palette is dry, take a pair of scissors or a utility knife and carefully cut through the skin on one of the corners just enough so you can grab the skin and start pealing it up. Go slowly to so that you get a large piece without tearing it. You’ll notice that the reverse side will have a uniform surface and may also have interesting color and brushstroke combinations that are usable. It’s a twofer!
©Christine Sauer, pear shaped paint skin
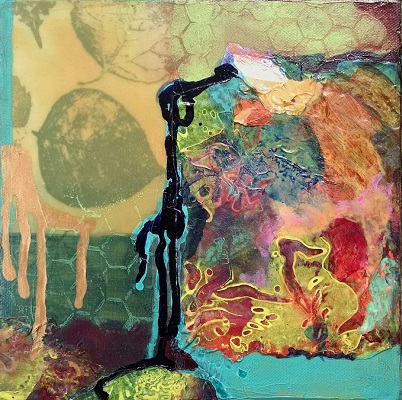
Pictured above, I cut the paint palette skin into a pear shape with scissors. Adhere the skin to your painting surface by applying a liberal coating of Soft Gel Matte or Gloss to the back of the skin. It may take a couple of hours to dry completely depending on temperature and humidity. "Network II", pictured below, is a painting where I used a paint skin on the right-hand section as part of the overall design. Paint skins can be used in a myriad of ways so give them a try!
*** Store them flat and individually between sheets of wax paper, parchment or sheet protectors. I keep them in shallow drawers so as not to stack too many on top of each other. Handle them carefully as they will stick to each other and are hard to separate without tearing.
©Christine Sauer “Network II” 8x8” , acrylic and paper on canvas


